Here’s a quick guide on setting up your quiz as a standalone page. The Standalone Page publish type allows you to publish your quiz as an independent Shopify page with its own unique URL. Here’s how to set it up.
Step-by-Step: Create a Standalone Quiz Page #
1. Go to the Recomma app in your Store Dashboard and edit the quiz that you want to publish.
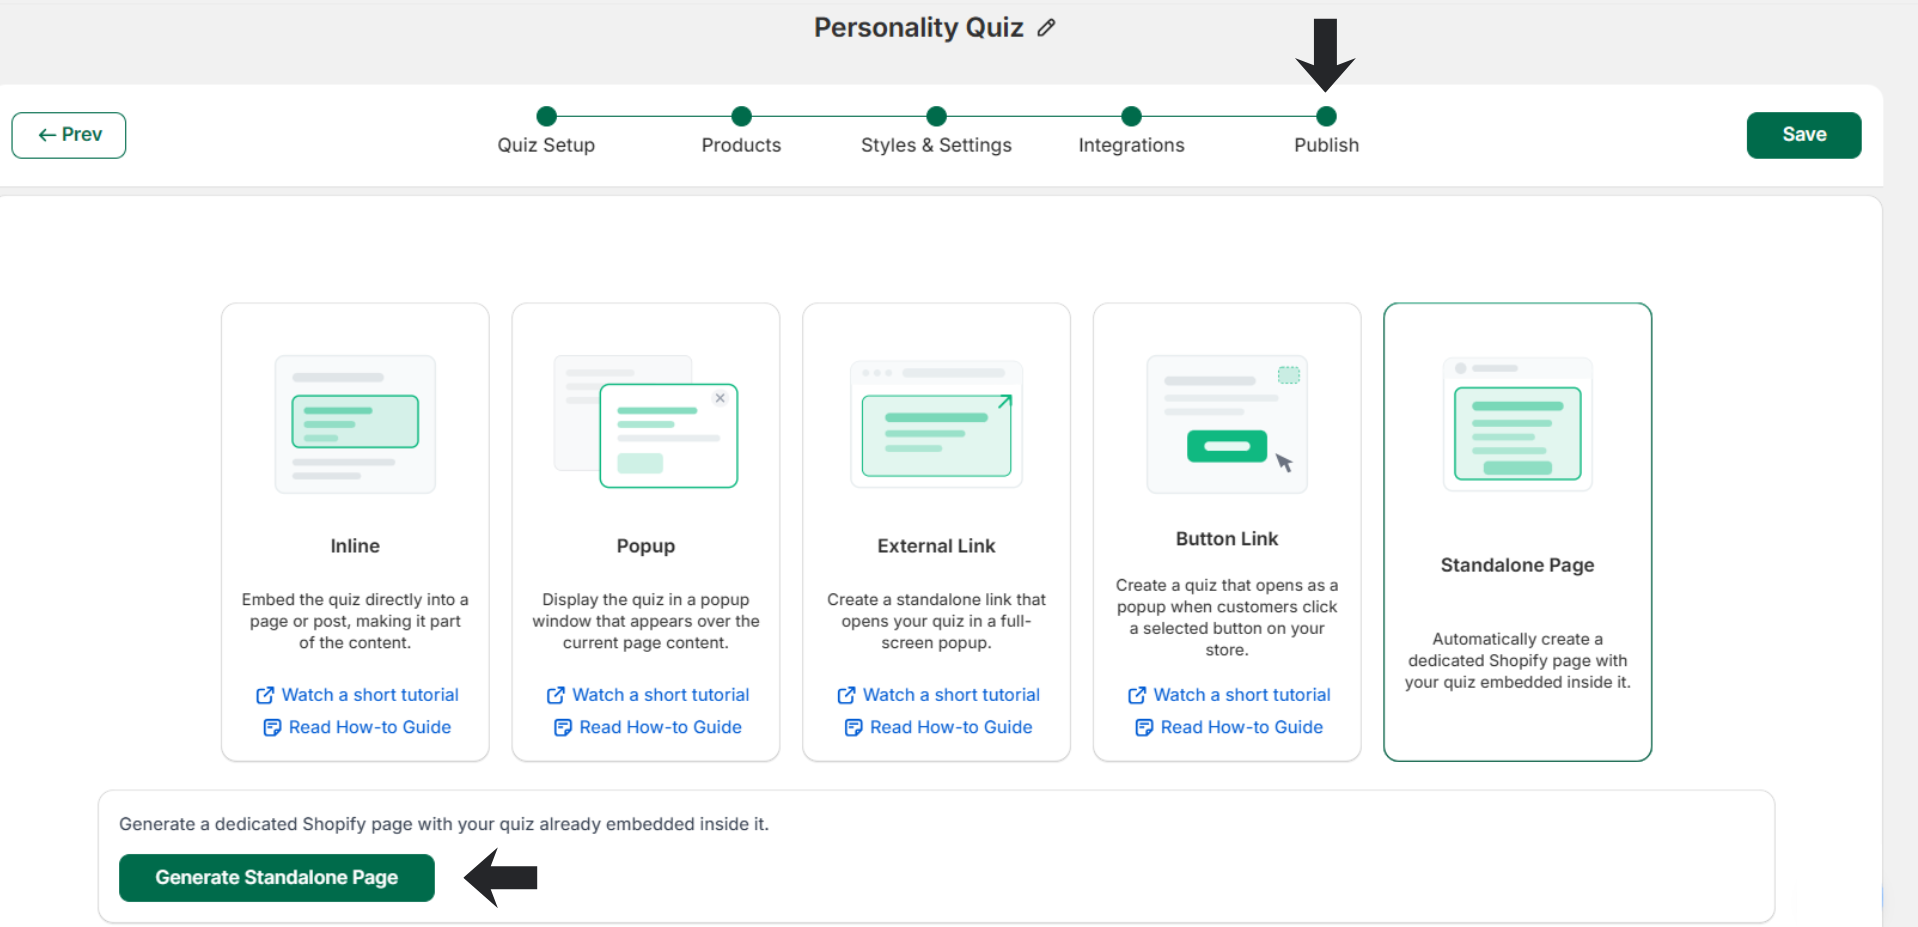
2. Navigate to the Publish tab and select Standalone Page as your publish method.
3. At the bottom, you will see the “Generate Standalone Page” button that allows you to create a separate page that has the quiz embedded in it. Click the button.
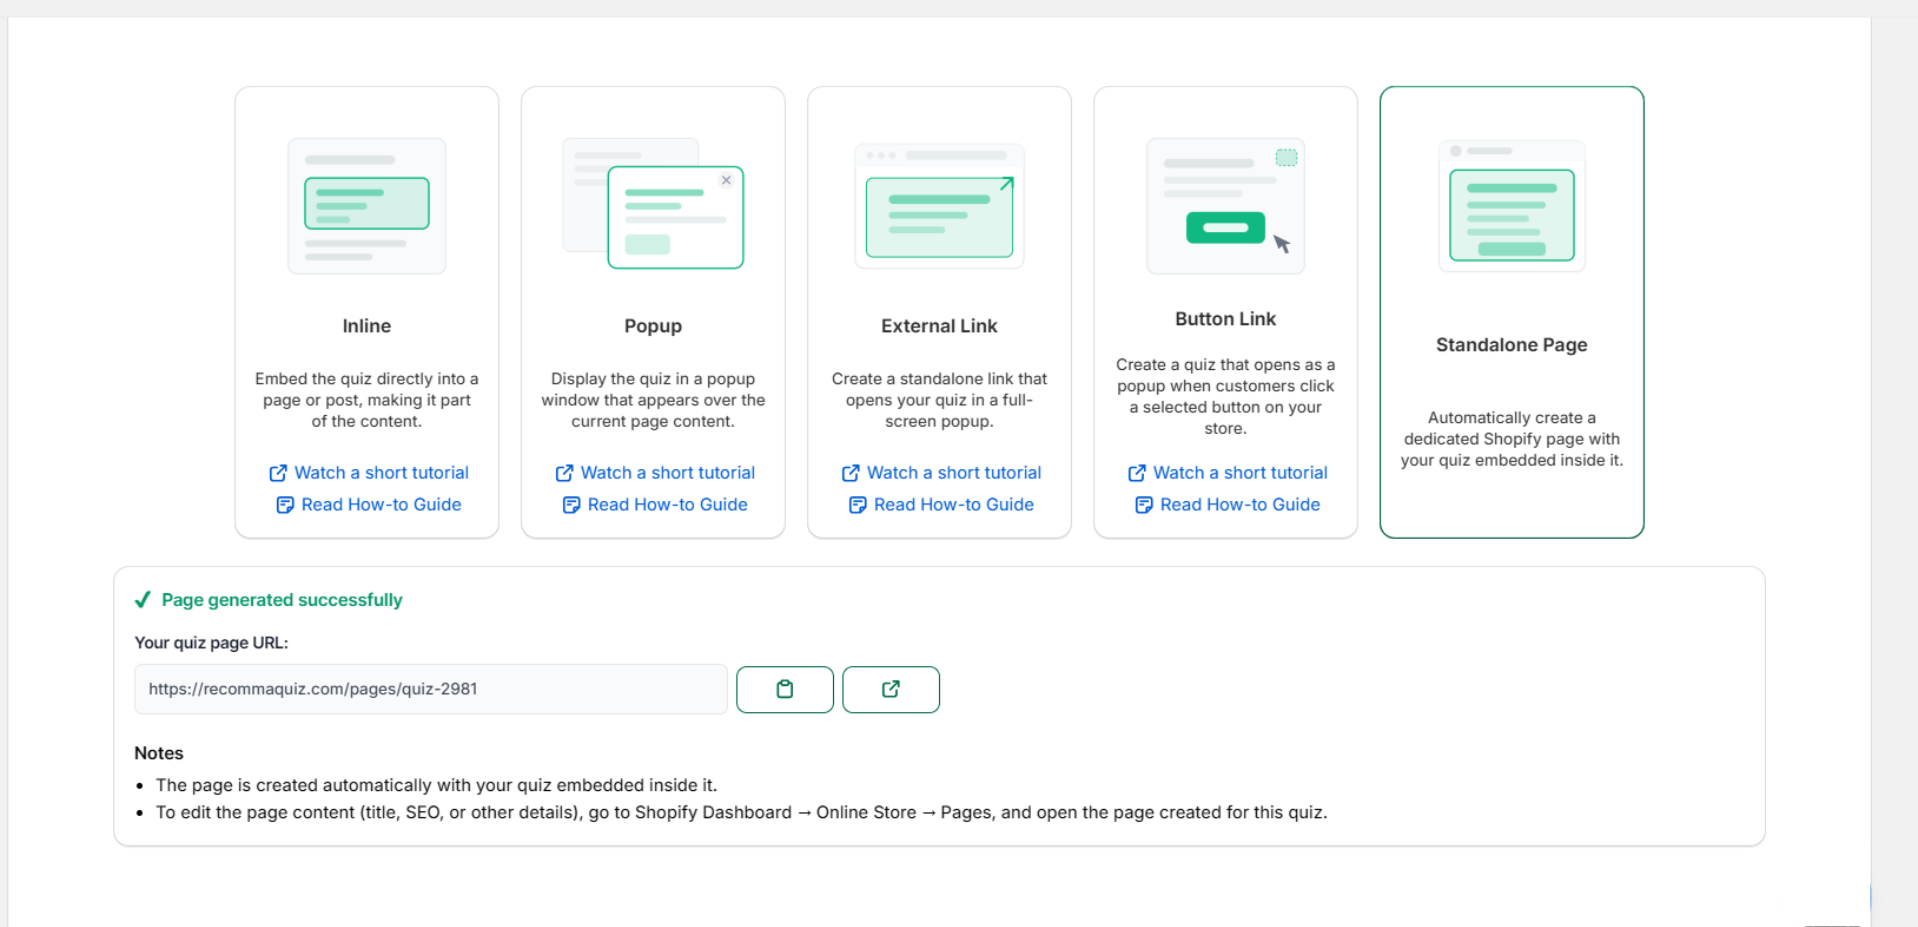
Once you click it, a link to the page URL will be generated that you can either preview or copy.
Editing Content (Title, URL, etc) #
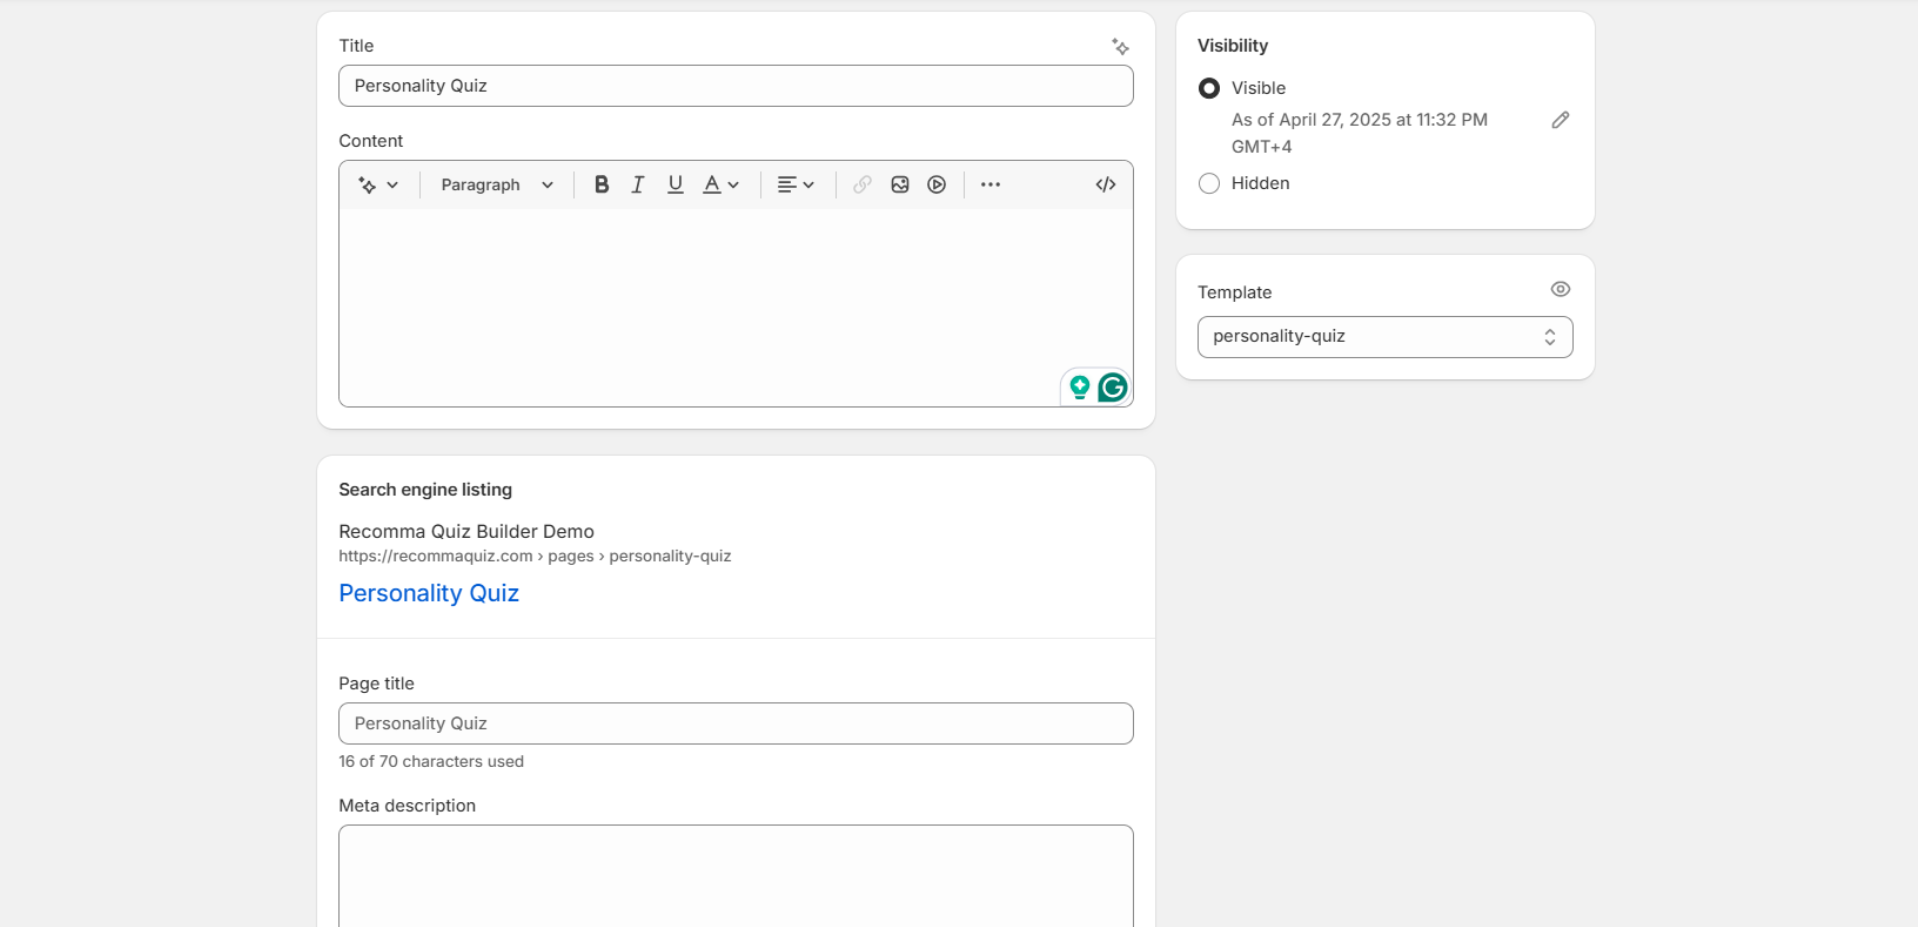
If you want to edit the content of that page regarding SEO (meta description, Title, URL, etc), you need to:
- Go to your Shopify Dashboard
- Then Online Store > Pages

Once you find the quiz you were looking for, you’ll be able to edit the content and simultaneously see what it would look like if it were a finished product
How To Hide Header And Footer #
In order to hide the header and/or footer in your quiz’s page:
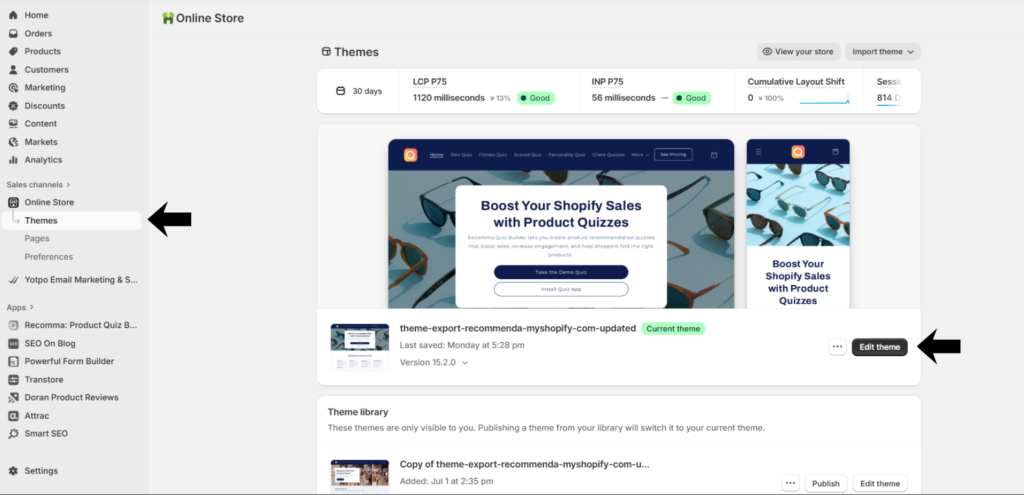
1. Online Store > Themes > Edit Theme
2. Theme Settings > Scroll down to Custom CSS
3. Paste the CSS provided below the image.
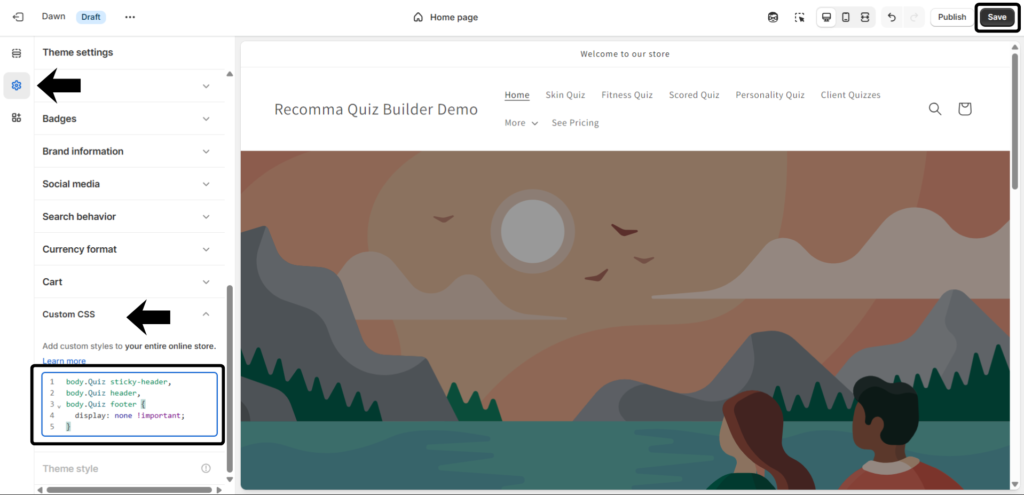
body.Quiz sticky-header,
body.Quiz header,
body.Quiz footer {
display: none !important;
}
4. And click “Save” in order to apply changes.
We use CSS to hide the header and footer because if we rely solely on the theme settings to do so, it will hide the header and footer across the entire site instead of just on the quiz page.
Publishing your content as a Standalone Page is recommended because it provides a clean, focused layout that engages your audience directly. It allows you to control how your content is presented and shared, making it easy to distribute via links, social media, or other channels.
This publish type also supports features like ad integration and engagement tracking, ensuring your audience can interact with your content without distractions from other site elements.
That’s it! If you still have questions, check out the video tutorial below.


