This guide will walk you through how to use Recomma quiz results with Klaviyo to create and send personalized campaigns in Shopify. By the end, you’ll know how to use quiz responses to integrate them into Klaviyo, and deliver customized email campaigns to your audience.
It allows you to create more effective outreach by targeting customers with product recommendations that are directly relevant to them. The process also delivers a personalized customer experience, since emails can automatically include each customer’s name, their quiz results, and even a personal result page link they can revisit at any time.
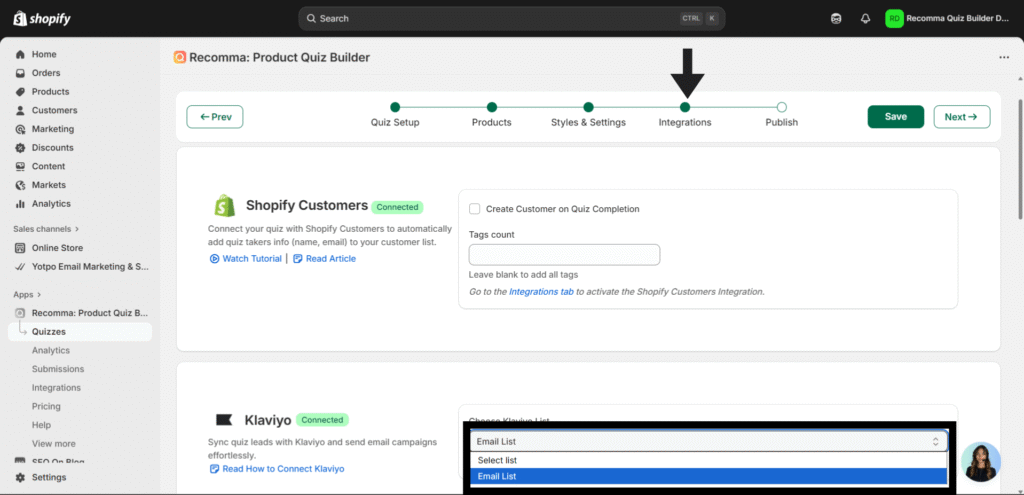
Connecting Recomma to Klaviyo #
Before creating campaigns, you need to connect Recomma with Klaviyo. Full setup instructions to read are available here, you can also watch the guide here.
Once connected, make sure to choose a list from the Integrations tab in your Recomma quiz settings.
Creating the Email Template in Klaviyo #
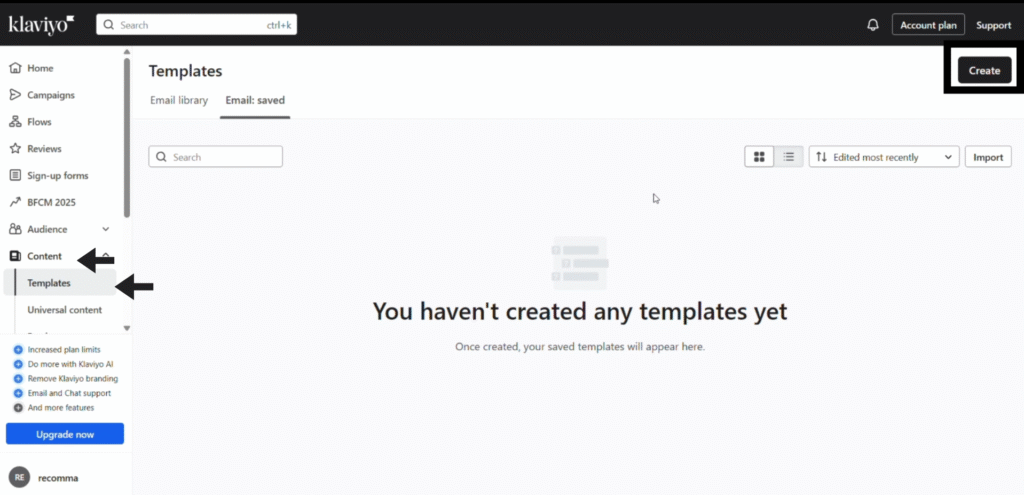
Step 1: Start from Templates #
Begin by navigating to Content → Templates in Klaviyo. Here, you can either select from one of the pre-designed layouts or start from a blank template if you prefer to build everything from scratch.
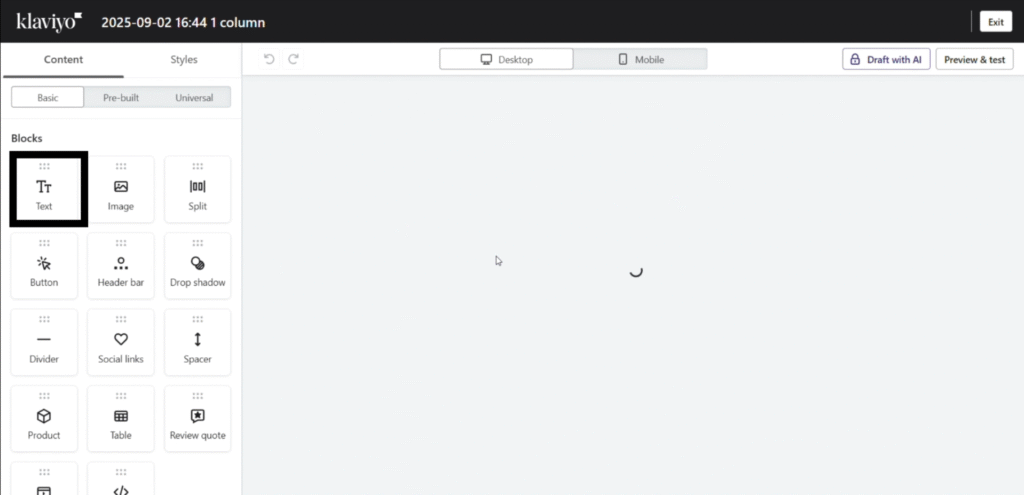
Step 2: Customize the Template #
Once you have chosen a template, you can begin customizing it to match your brand and the purpose of your campaign. Replace placeholder content with your logo, product images, and a header such as Quiz Results. Add a text block to write the body of your email.
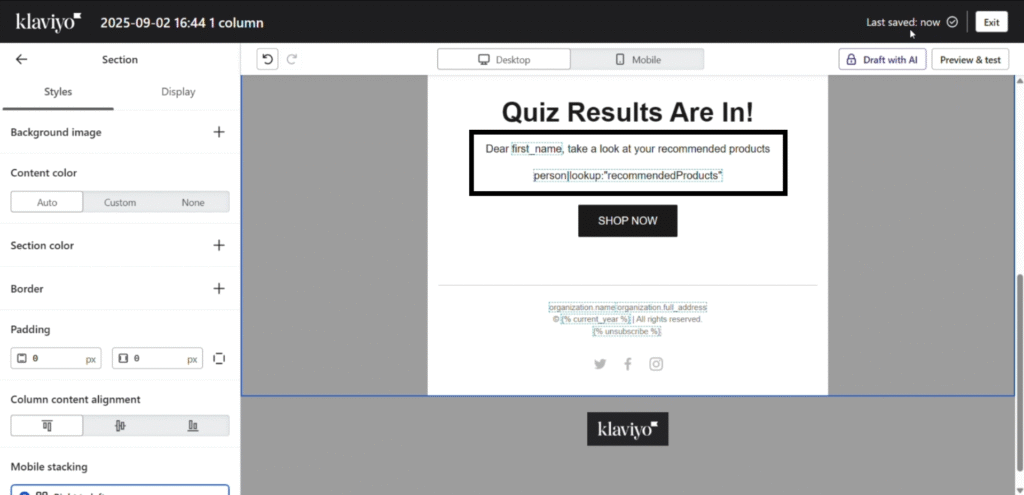
Step 3: Insert Dynamic Fields (Personalization Codes) #
To make your emails personalized, you’ll need to use data collected from quiz submissions. Each customer profile in Klaviyo stores this information as Key–Value pairs, where the Key is the quiz question or data field, and the Value is the customer’s answer.
For example:
- Key: recomendedProducts
- Value:classic sunglasses

To insert personalization into your email:
- Open the Source Code editor of your template.
- Use the following codes to display customer details:
- For the First name: {{ first_name }}
- Last name: {{ last_name }}
- Email: {{ email }}

- To show the recommended product, use:
- {{ person | lookup: “recommendedProducts” }}
- {{ person | lookup: “recommendedProducts” }}
- You can also insert the Result Page Link so customers can revisit their personalized recommendation page anytime.
- Key: result link
- Value: the customer’s individual result page URL
- Code: {{ person | lookup: “resultLink” }}
These codes must be typed exactly as shown, using an English keyboard. Any typo or formatting error will cause the campaign to fail or be canceled.
For your products to appear as images and not just plain text, you can use the code below instead of {{ person | lookup: “resultLink” }}.
{# Loop over your custom profile property #}
{% for item in person|lookup:’recommendedProductsData’ %}
{% if item %}

{% if item.image %} {{ item.title }} {% endif %}

{% if item.url %} {{ item.title | safe }} {% else %} {{ item.title | safe }} {% endif %}

{% if item.description %} {{ item.description | safe }} {% endif %}

{% if item.compare_at_price and item.compare_at_price > item.price %} {{ item.compare_at_price | floatformat:2 }} {% endif %} {% if item.price %} {{ item.price | floatformat:2 }} $ {% endif %}

{% endif %}
{% endfor %}
Step 4: Check the Personalization Codes #
After inserting the dynamic fields, click outside of the text block. If a blue outline appears around the code area, it means the code is correct and will function as expected.
Creating & Sending Campaigns #
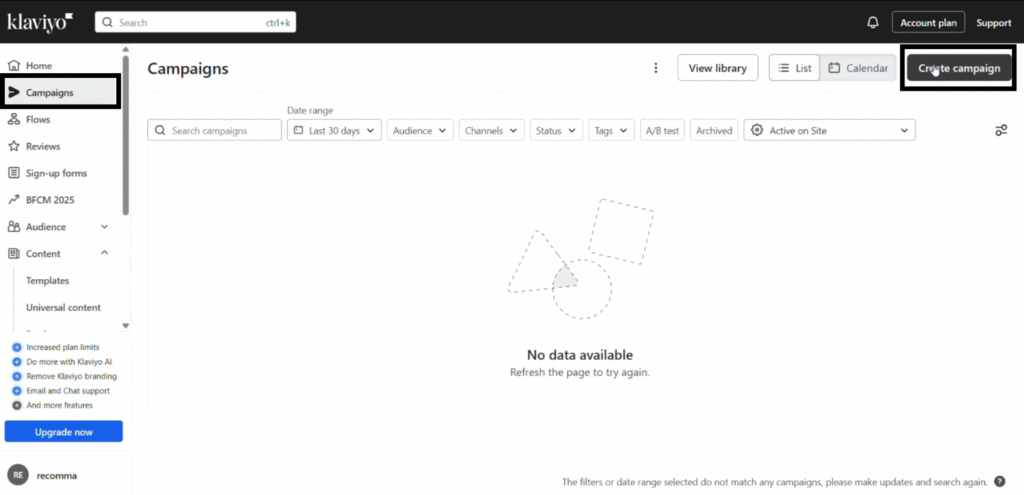
Step 1: Create Campaign #
Begin by navigating to Campaigns → Create Campaign in Klaviyo. Enter a descriptive campaign name, such as Classic Sunglasses. Select Email as the campaign type and click Continue.
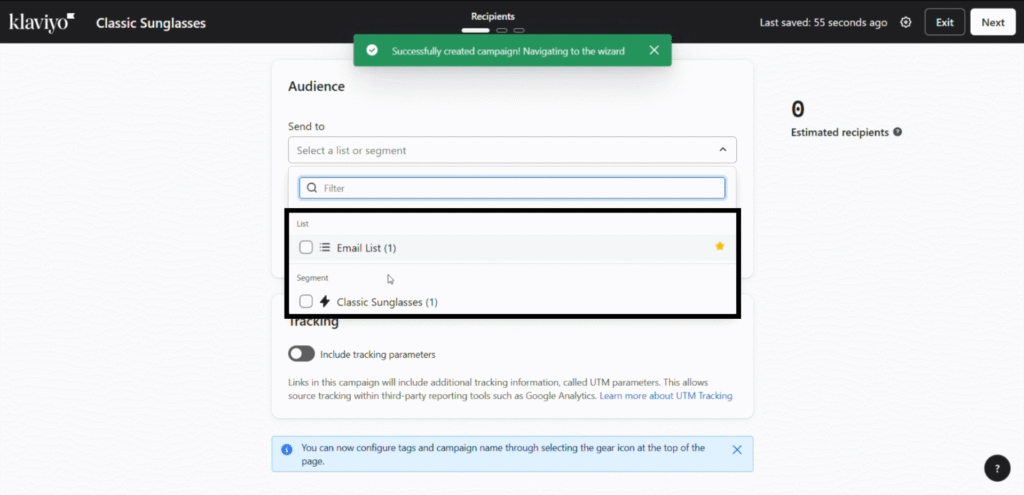
Step 2: Choose Audience #
Next, select the audience for your campaign. You can choose from existing lists or segments. You can find how to create segments that integrate Recomma quiz results with Klaviyo here.
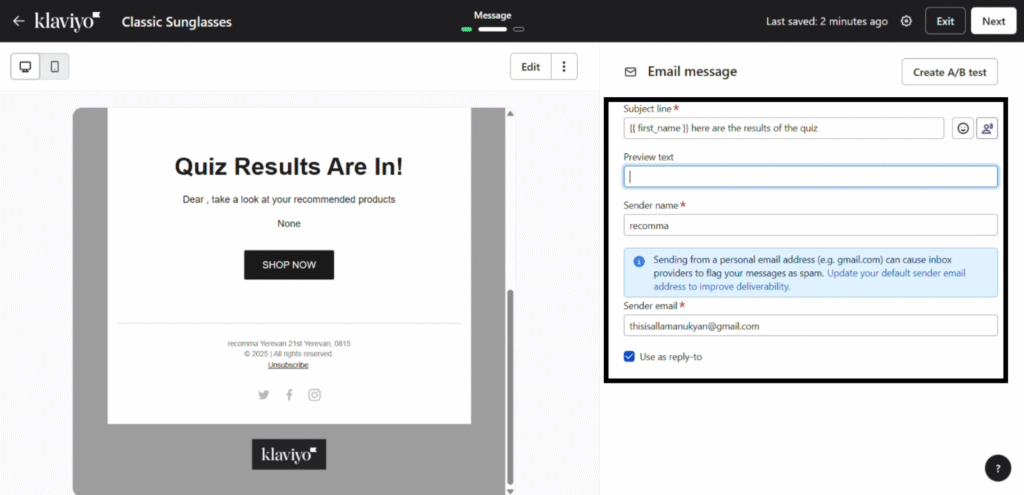
Step 3: Configure Campaign Details #
Choose the email template you prepared in the previous steps. You can further customize the campaign, including:
- Subject line: Use dynamic fields such as {{ first_name }} or {{ recommended product }} to personalize the message.
- Preview text: Customize it to show the customer a sneak peek of their personalized content.
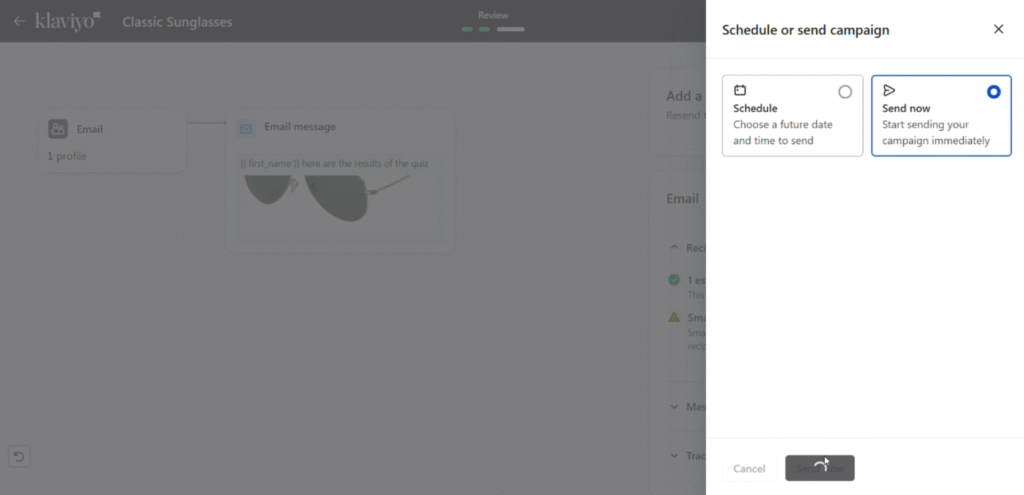
Step 4: Finalize & Send #
You have two options to send:
- Schedule the campaign for a future time.
- Send Now to deliver the email immediately.
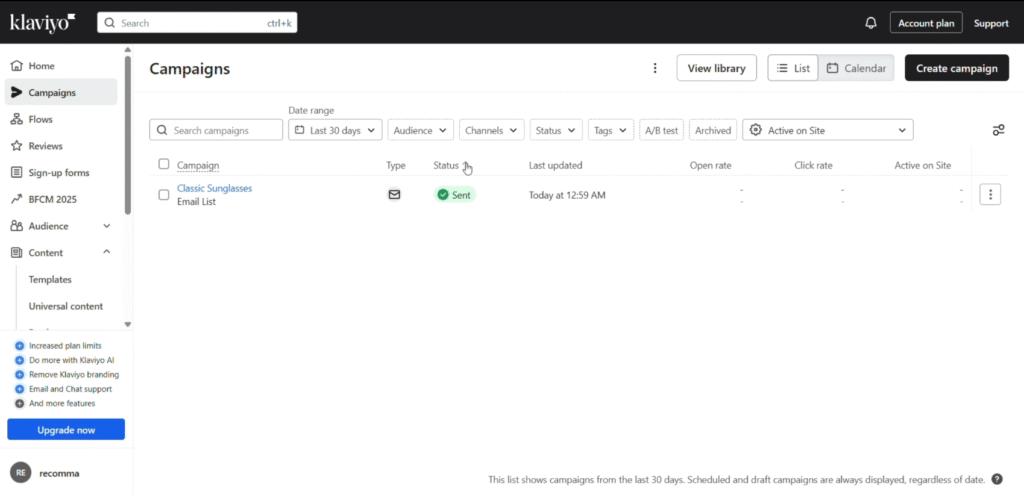
After sending, verify that the campaign status updates to Sent. It might take a while.
Step 5: Confirm Delivery #
To ensure everything is working correctly, open a test recipient inbox. The email should display the correct customer name, the personalized quiz result, and any other dynamic content such as the recommended product or result page link.

You can also watch the in-depth video tutorial below.


