In this guide, we’ll show you how to connect your Recomma Quiz Builder quiz to Zapier, a popular automation platform that connects thousands of apps.
By linking your quiz to Zapier, you can automatically send quiz leads — like emails, names, answers, and more — to your favorite tools such as Google Sheets, CRMs, or email marketing services.
Ready to automate your quiz leads? Let’s get started!
Getting Started: How to Connect Recomma to Zapier #
To connect Recomma Quiz Builder to Zapier, follow these steps:
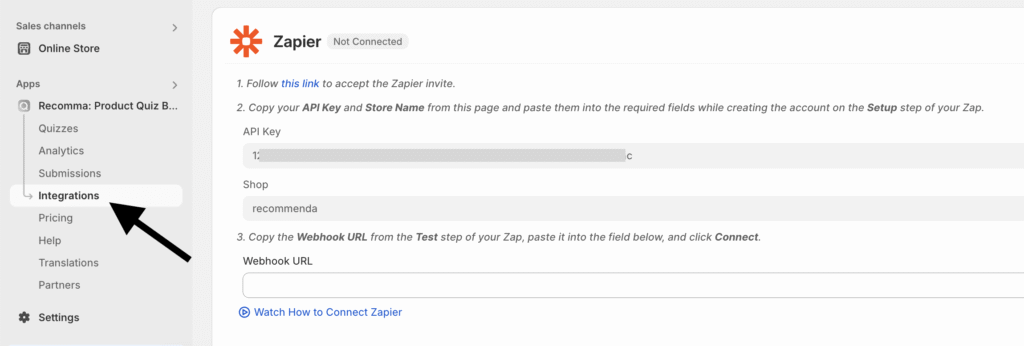
1. Go to your Recomma Dashboard and open the Integrations section from the main menu.
2. Scroll down and find the Zapier integration. There, you’ll see a brief guide with a special invite link and setup instructions.
3. Before starting the setup, make sure you have a Zapier account.
If you don’t, sign up here. If you already have an account, log in first so that you’ll be redirected correctly.
4. Then, follow this link to accept the Zapier invite. You’ll be redirected to a page that says:
“You have been invited to use Recomma on Zapier!”
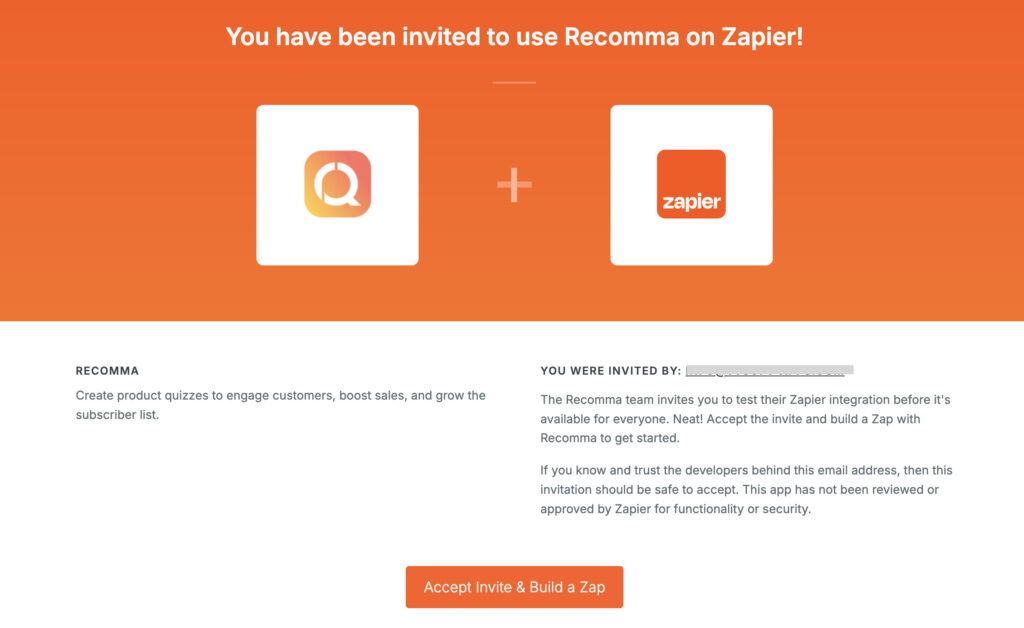
Click the “Accept Invite & Build a Zap” button.
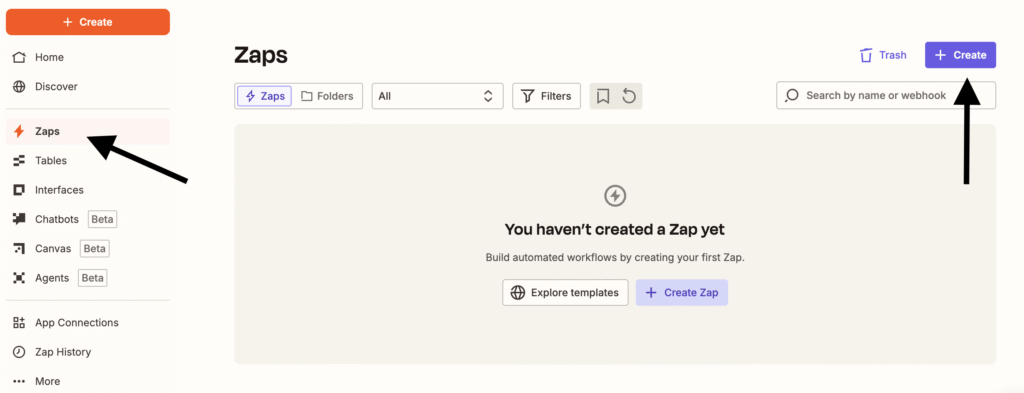
5. After accepting the invite, you’ll be redirected to the Zaps section of your Zapier dashboard.
This is where you can manage and create your automations.
7. Click the + Create button, then select New Zap to start building your new Zap.
8. After that, you’ll see the Zap editor dashboard where you set up your automation. Start by configuring the Trigger — this tells Zapier when to start the workflow.
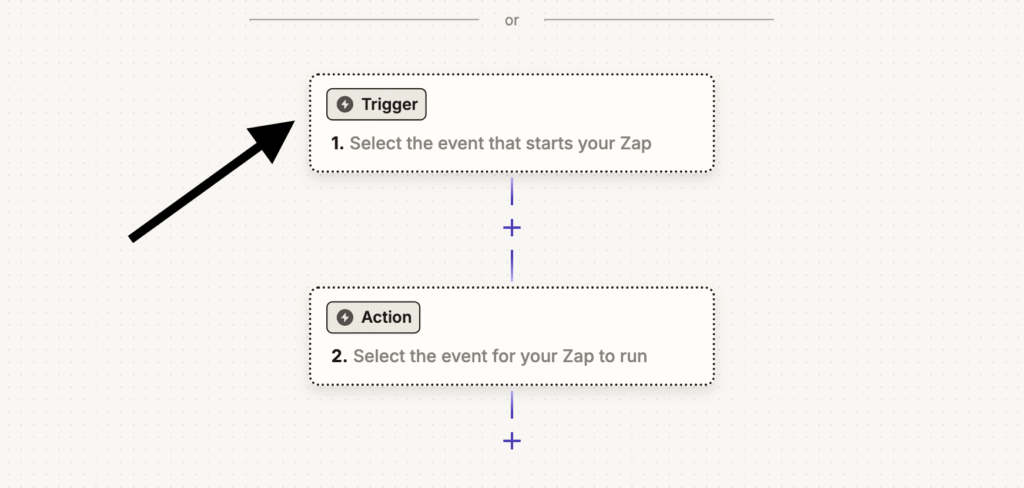
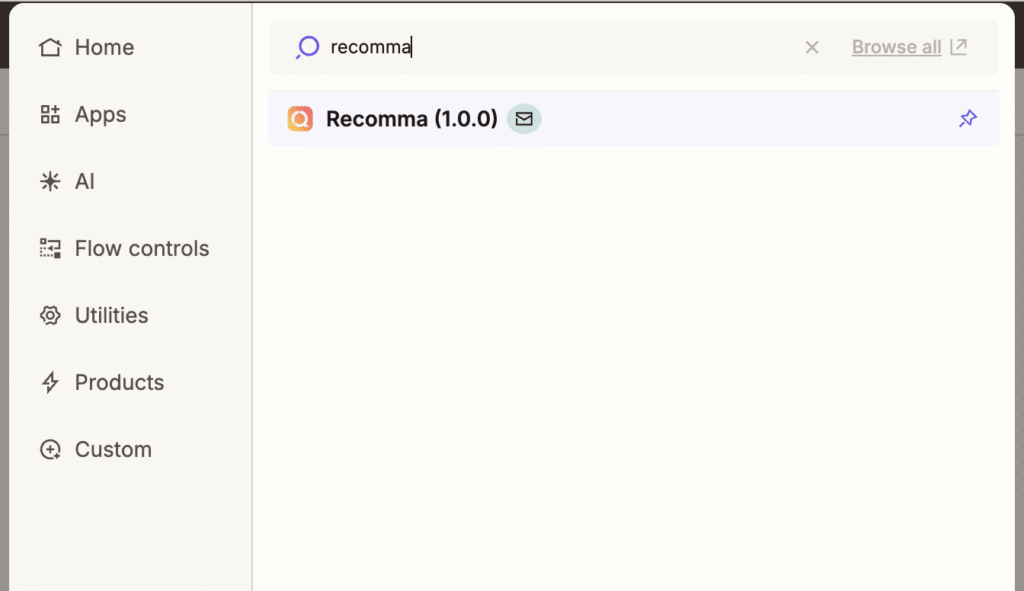
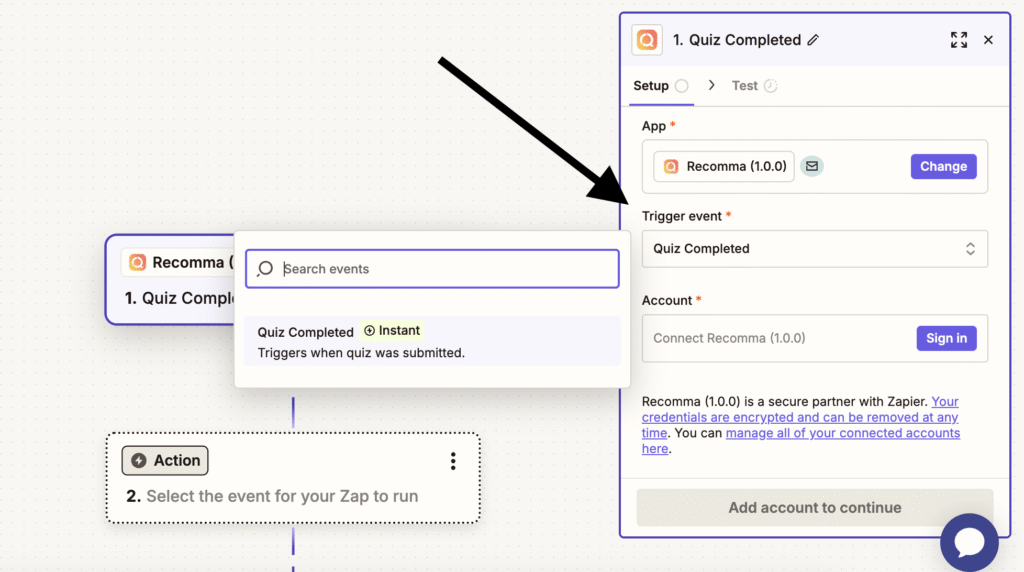
Click on the Trigger section, then use the search bar to type “Recomma”. Select Recomma from the list of apps.
9. On the right side, the event settings will appear. Select Quiz Completed as the Trigger Event.
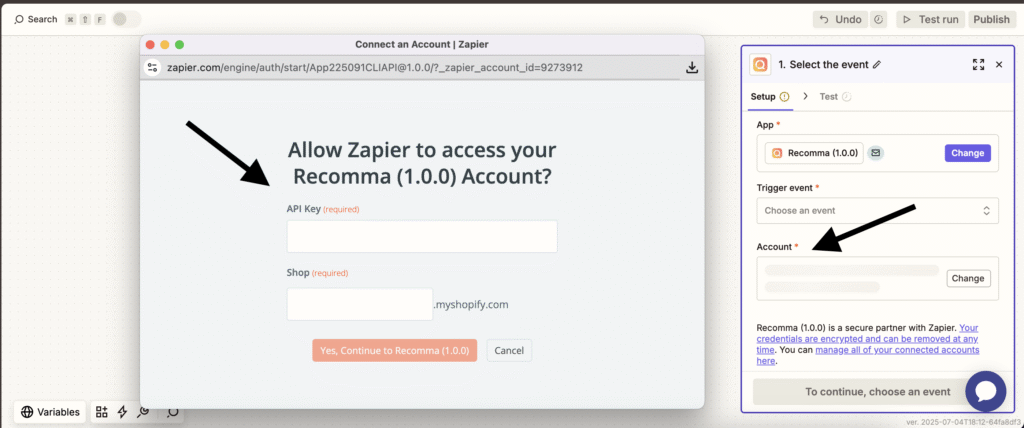
10. Next, you need to select your Account.
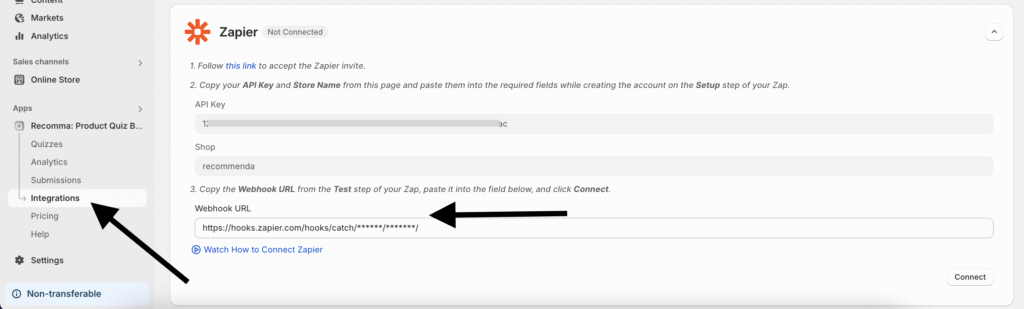
Click the Sign In button, then a popup window will appear asking: “Allow Zapier to access your Recomma (1.0.0) Account?” You’ll see two fields to fill in: API Key and Shop.
11. After connecting your account, click the Continue button to move to the Configure Trigger section. Here, you’ll be asked to enter your Quiz ID.
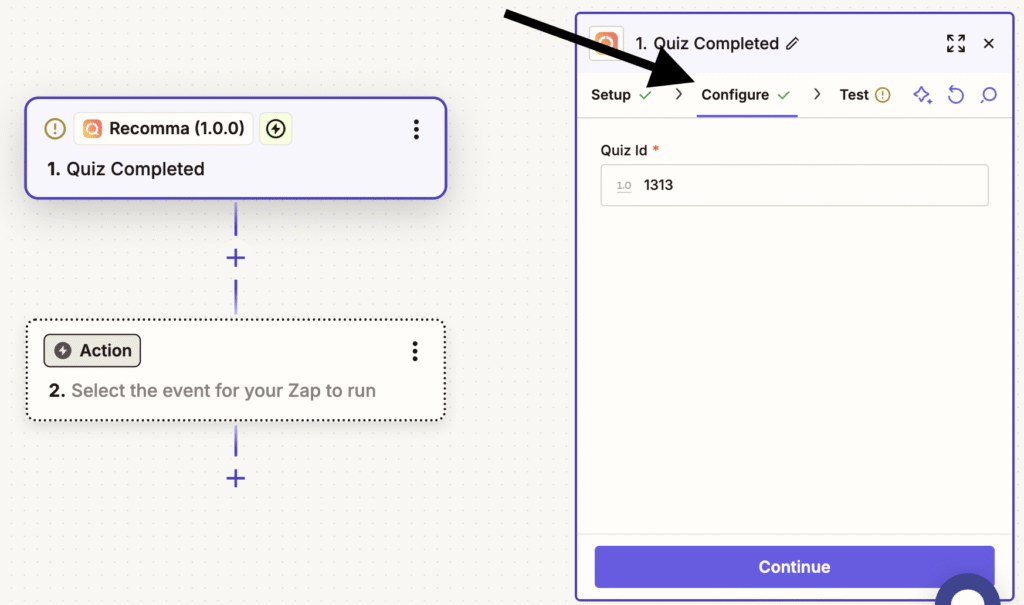
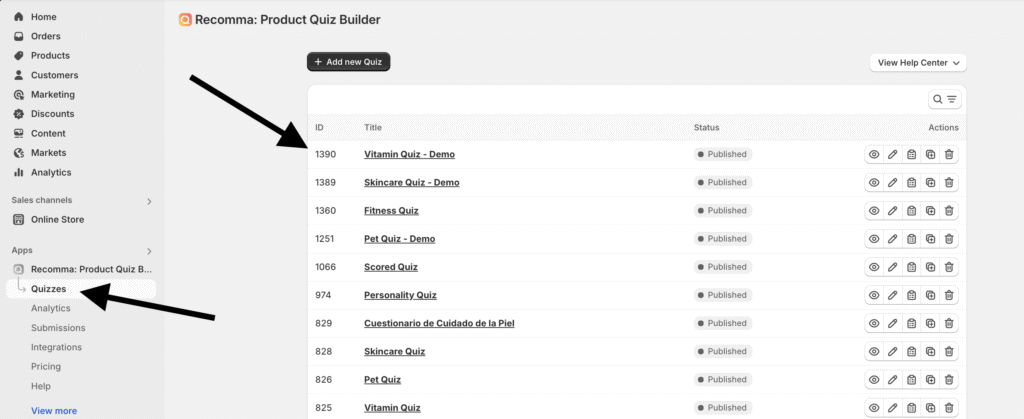
To find it, go back to your Shopify Dashboard → Recomma → Quizzes.
In the quiz list table, you’ll see the Quiz ID displayed in the first column next to each quiz.
Copy the ID of the quiz you want to connect and paste it into the Quiz ID field in Zapier and click the Continue button.
12. After entering your Quiz ID, Zapier will take you to the Test section. Here, a Webhook URL will be generated.
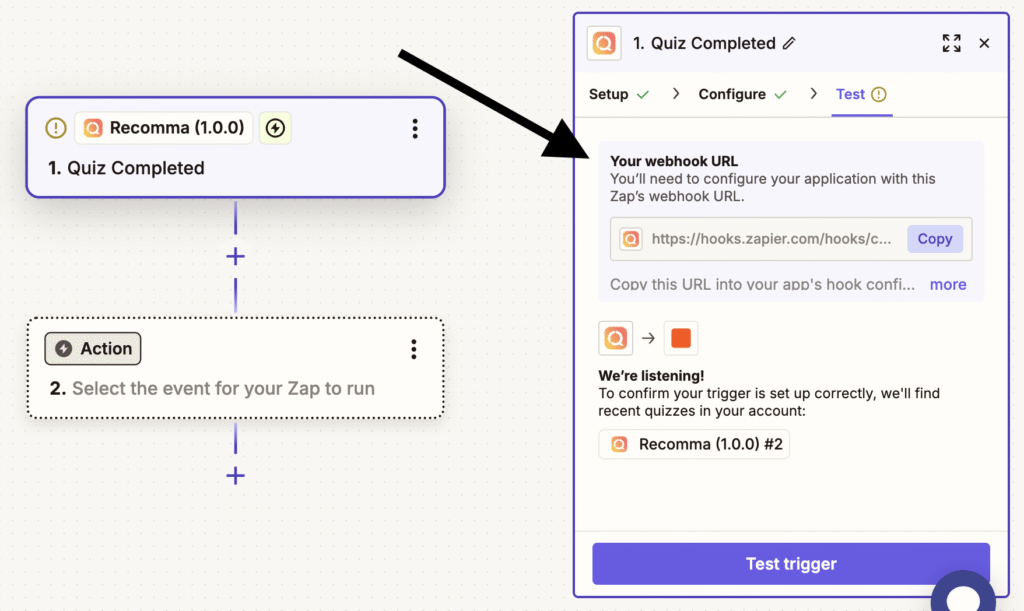
Copy the Webhook URL, then go back to your Shopify Dashboard → Recomma → Integrations → Zapier section.
Paste the URL into the Webhook URL field and click the Connect button.
Once everything is set up, go back to the Zapier dashboard and click the Test Trigger button to make sure everything is working correctly.
That’s it! You’ve successfully connected your Recomma quiz to Zapier. Congrats — your quiz leads can now flow directly into your favorite apps!
What Data Does Recomma Quiz Builder Send to Zapier? #
When a user completes your quiz, Recomma sends the following data to Zapier:
- Quiz Title
- Quiz ID
- Name (if you include a Name question)
- Email (required for lead capture)
- Phone (if you include a Phone question)
You can use this data to populate your CRM, email list, Google Sheet, or any other connected app in Zapier.


