Welcome to Your Quiz-Building Journey! This guide will provide clear, step-by-step instructions for creating your first quiz on Shopify via Recomma Quiz Builder.
Let’s Start! #
After successfully installing the app using the Installation Guide, navigate to your Shopify Dashboard. Go to the Apps section in your Shopify Dashboard and search for Recomma Quiz Builder. From there, follow these steps to create your first quiz:
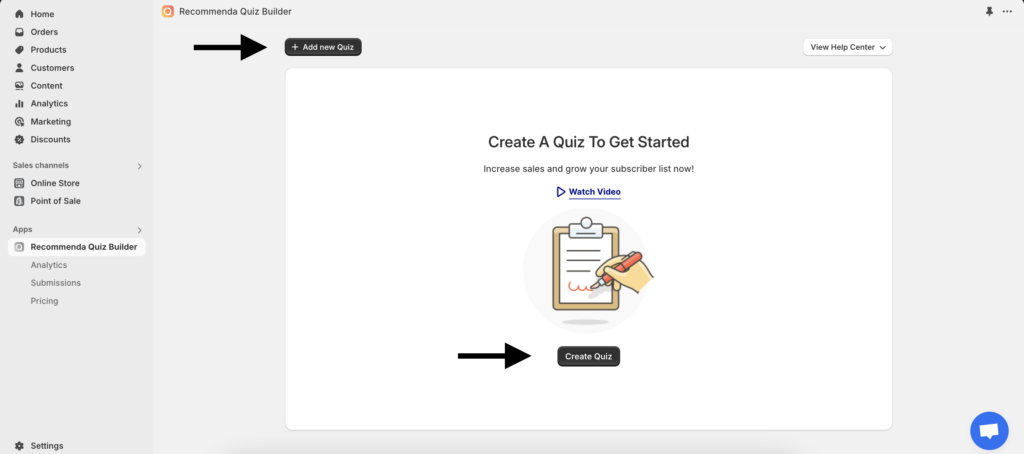
Click on the Add New Quiz or Create Quiz button. This will open the quiz setup section, designed specifically for quiz creation.

These are short steps on how to create a simple quiz using the recommendation quiz builder. In this article, you will find detailed information about each part of the Quiz Setup section.
How to Create Simple Quiz in Minutes #
- Click the Add New Quiz button and set up the welcome page.
- Next, add your questions and corresponding choices.
- Then, configure the results page and navigate to the Products section, where you will link each answer to specific products from your shop.
- Enter your Quiz Title and select your desired Theme.
- Finally, connect your preferred Integration and choose a Publish method.
- Save your changes.
Explore the Quiz Setup Interface #
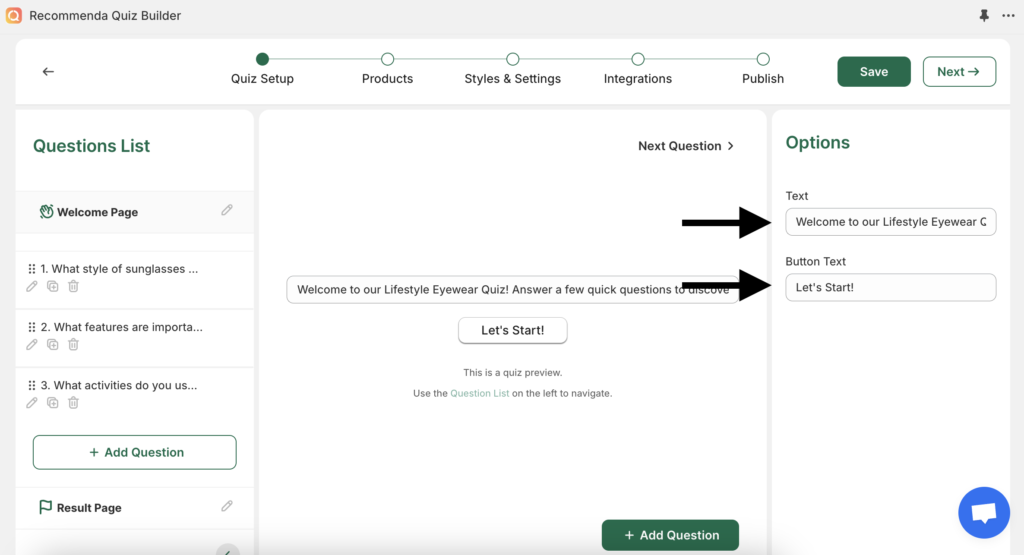
On the left side, you will find the Question List section, which allows you to easily navigate between questions, as well as configure the Welcome page and Result page.
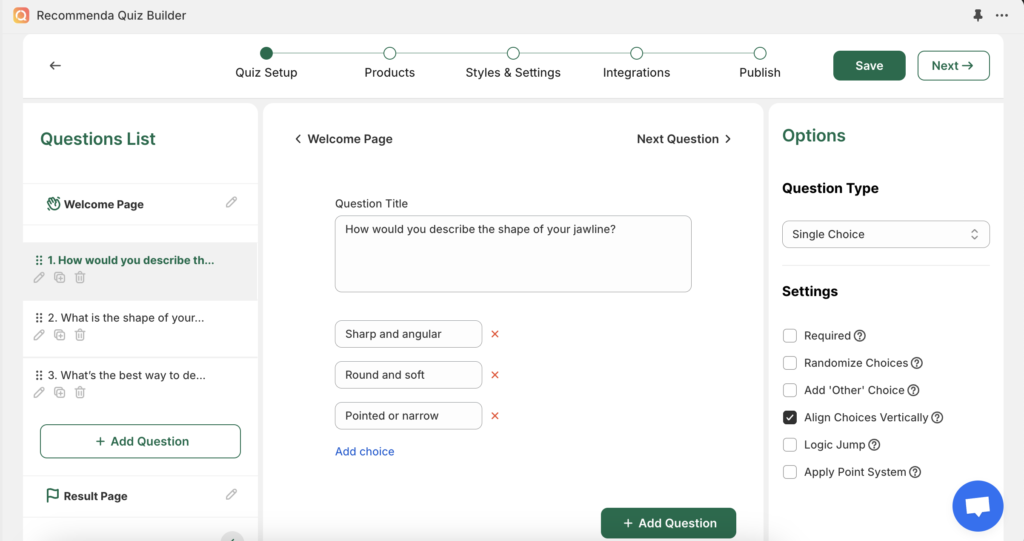
In the center area, you can enter your text for both questions and answers.
On the right side of the screen, various options will be available for each question, as well as for the Welcome and Result pages. Here, you can adjust settings to personalize your quiz according to your preferences.

Welcome Page Configurations #
The welcome page is the first thing users see when they start your quiz, so it’s important to make it inviting and engaging.
Use the Text textarea to write your welcome message, and set the button name with the Button Text option found on the right side of the screen.

Creating Your First Question #
1. Click on the “Add Question” button and choose your preferred question type. The following are available:
- Single Choice
- Multiple Choice
- Picture Choice
- Dropdown
- Yes/No
- Info Screen
- Text
- Phone
- Name
2. Enter your question title and choices as needed. Use the “Add Choice” button to create a new choice, and delete choices by clicking the “X” icon.
Basically, you are done! You’ve created your fist question. For advanced needs, you can adjust the following options:
- Required: Make the question mandatory, so users can’t skip it.
- Randomize Choices: Shuffle the answer choices each time the question appears.
- Add ‘Other’ Choice: Add an “Other” option to let users type in their own answer if none of the choices fit.
- Align Choices Vertically: Display the choices in a vertical list.
- Logic Jump: Use this to direct users to different questions based on their previous answers, creating a more customized experience.
- Apply Point System: Assign different point values to answer choices, giving more weight to certain answers (e.g., 2 points for more important choices and 1 point for less important ones). This helps create more relevant recommendations based on the importance of each response.

Result Page Configurations #
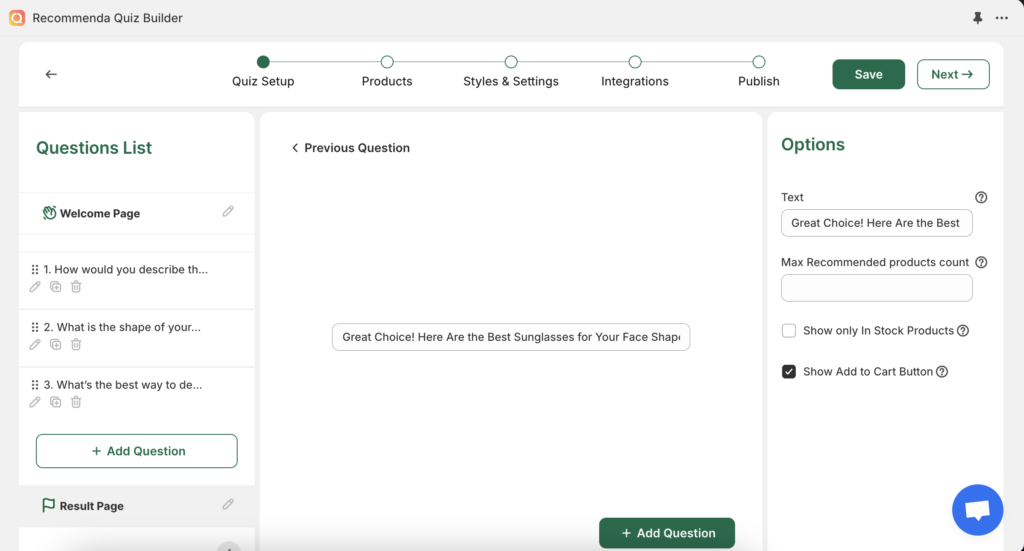
The results page is where users will see the outcome of their quiz, including personalized product recommendations. You can customize this page to improve user experience and encourage purchases.
Use the Text area to write your message that explains the results or thanks for the participation.
Set the Max Recommended Products Count to limit how many products are shown.
Check the box to Show Only In Stock Products to ensure users see items that are available for purchase.
Finally, enable the Show Add to Cart Button option to make it easy for users to add recommended products to their cart.


